Enabling new Capture features
The latest version of Capture brings with it a number of inherent benefits, from even better data to improved search functionality, but it also provides additional features that you can enable if you wish. These features are:
- Enhanced location biasing: automatically detect users' locations to assist the scoring and ranking of search results, helping to find the nearest matching addresses without requiring a full address to be entered
- Advanced results filtering: restrict the results that are returned by Capture based on custom parameters that you can choose
These new features are all optional, and you can choose to enable one, some or all of them. Please note that if you do enable any of these new features, they will apply to all Capture searches.
Setup
All of these new features can be switched on or off in your Loqate account. Here are the steps to follow to begin with:
- Log into your account
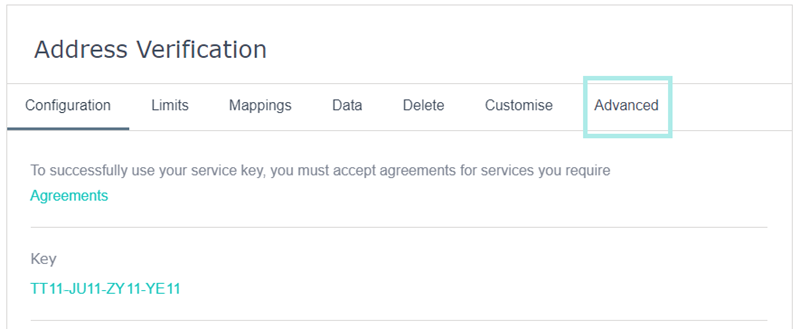
- Choose the service you want to edit (this will usually be listed as 'Address Verification')
- Navigate to the Advanced tab
Follow the further steps below for each of the features you want to turn on.
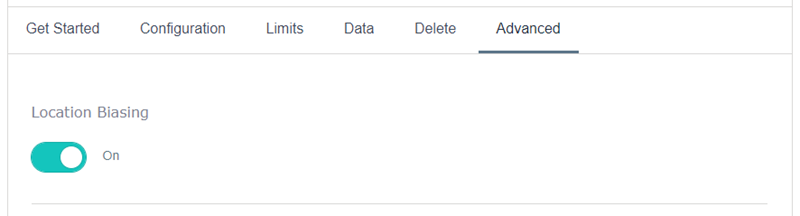
Location Biasing
Enabling the Location Biasing feature results in reduced keystrokes and a quicker address entry process for your customers.
Enabling the biasing feature is just a case of toggling the Location Biasing switch to On.
Advanced Results Filtering
The Filters feature allows you to set up one or more filters to restrict the results of your searches - i.e. to choose whether you want your searches to include or exclude certain things.
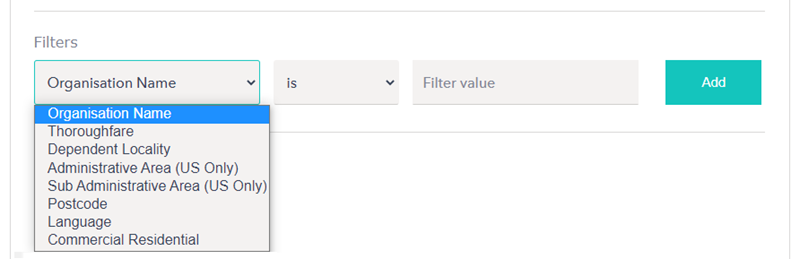
There are three components to each filter:
- Filter name: choose what you want to filter by - see the list below for details of each of the possible options
- Qualifier: choose is or is not to set whether you want to include or exclude results
- Filter value: set the specific value you want to include or exclude
For each filter you want to set up, fill in these three components and click the Add button. You can create multiple filters, depending on what you want to achieve.
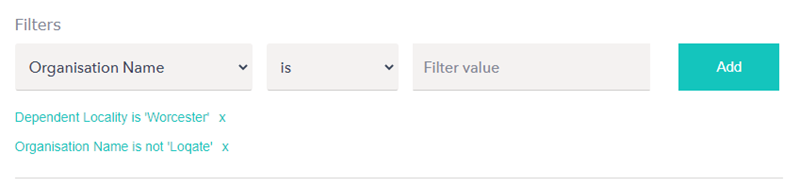
Note that if you include more than one filter, search results will need to fulfil both/all filters before being included.
Here is an example where two filters have been set up to allow for a search of addresses in the city of Worcester, excluding any addresses registered to Loqate (i.e. if you wanted to search a specific area but exclude one or more organisations):
Here are the full details of the different filters available (note that some are only available with US and CA data):
| Filter name | Description |
| Organisation Name | Company/business name |
| Thoroughfare | Street name (dependent or main street) |
| Dependent Locality | City (dependent or main locality) |
| Administrative Area (US Only) |
Only available for US and CA datasets, and refers to US State / CA Province or Territory Areas are specified as two letter code - e.g. AdministrativeArea: AB |
| Sub Administrative Area (US Only) |
Only available for US and CA datasets, and generally refers to smaller areas than Administrative Area For US this is usually County For CA this may vary based on the province, so could be County, Regional District, etc. |
| Postcode | Postal code/Postcode/Zip code |
| Language | Specified in ISO 639-2/B format (e.g. DEU for Germany & IND for Indonesia) - see here for more details |
| Commercial Residential |
Address type (Commercial or Residential); available for US addresses only To specify commercial or residential filters use the following syntax: &Filters=Attributes.CommercialResidential:Commercial &Filters=Attributes.CommercialResidential:Residential |
Any of these features can be enabled or disabled at any time. To disable any of them, just go back into your account and either de-select the relevant option or delete the relevant filter.
